Creating your first product listing
Attaching your product zip file
What to do if my product is rejected?
Why do my products need to be reviewed?
Getting Started
To register as an author, add your payment settings and verify your identity, follow the instructions below.
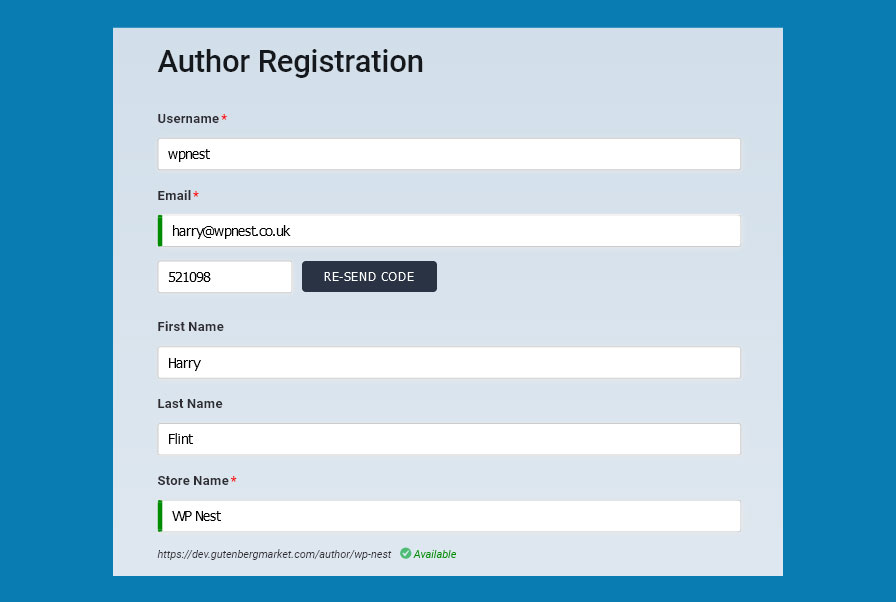
1. Complete the registration form
Simply fill in our author registration form and verify your email address in the process.
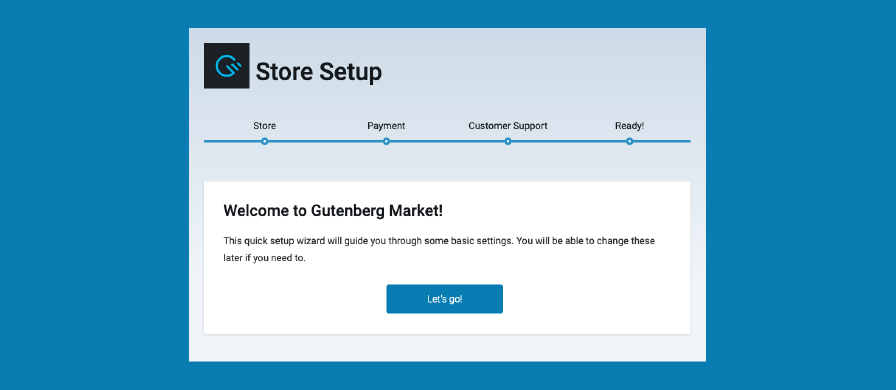
2. Setup your store using our setup wizard
After 4 simple steps, you can be on your way to creating your product listings.
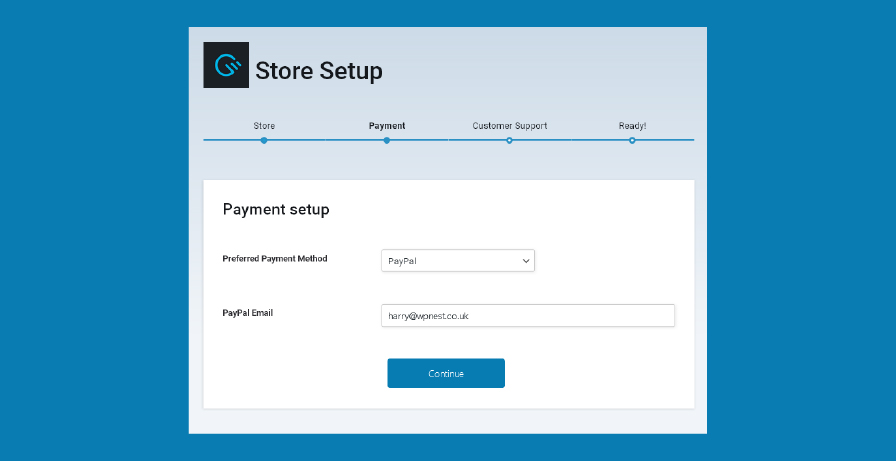
3. Add your PayPal email address
All payments to authors are currently processed by PayPal. You will need to enter your PayPal email address when creating your author account.
Please make sure you enter the correct email address as we are not responsible for payments being paid into the wrong account because of incorrect email addresses or typos.
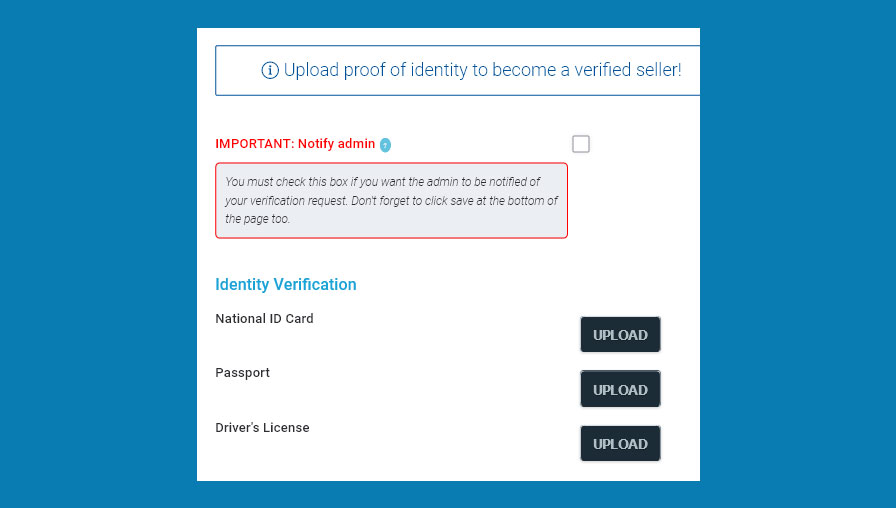
4. Verify your identity
In order to keep the marketplace safe, we require all authors to be verified. This means they must provide an accepted verification document. We accept a National ID Card, Passport or Driver’s licence. These must be uploaded in good quality and all details must be clearly visible. We take this very seriously and reserve the right to suspend or remove any accounts breaching or circumventing our verification methods.
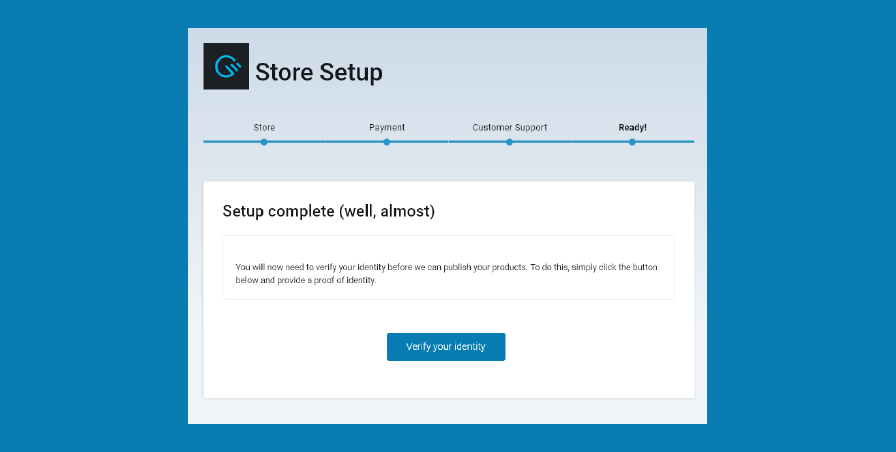
IMPORTANT: Please ensure when uploading your identification documents that you check the box for “Notify Admin” and save the page. If you do not check this box and save the page we will not be aware that you have uploaded your documents and your account will remain unverified.
5. Start adding your product listings
You can start creating your listings whilst waiting for verification. However, we will not publish your products until you have been verified. Verification may take up to 24 hours but it is usually much quicker. Please be patient and only contact us if verification has taken longer than 48 hours.
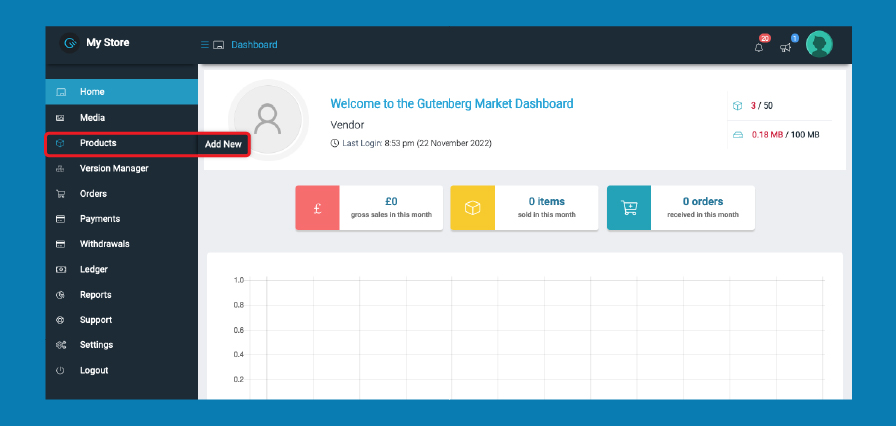
1. Add product
Hover over “Products” and click “Add New”.
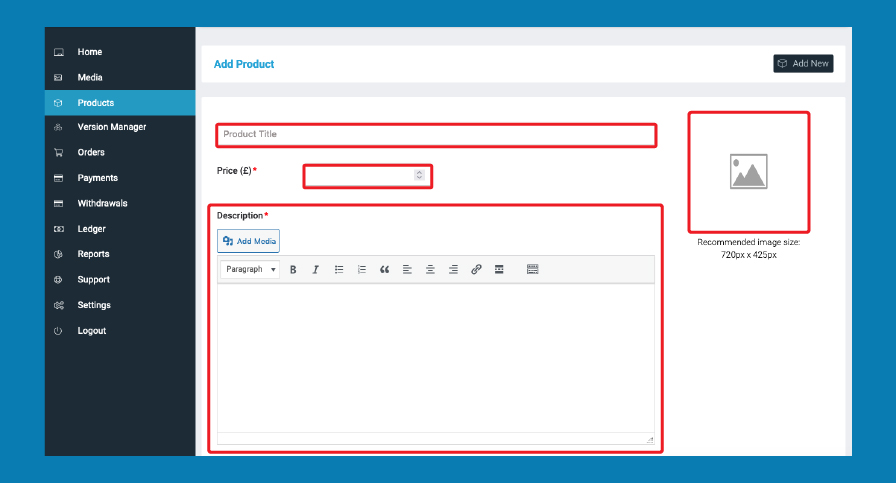
2. Enter main product information
Enter your product details such as title, price, description and your featured image. Please use the correct image size of 720px X 425px. If you do not upload the correct image size your listing may not be approved.
The description field is the main content area for your listing. Here you can add any marketing text and images you like to show off your product and its features. You must follow our author terms when populating this content area.
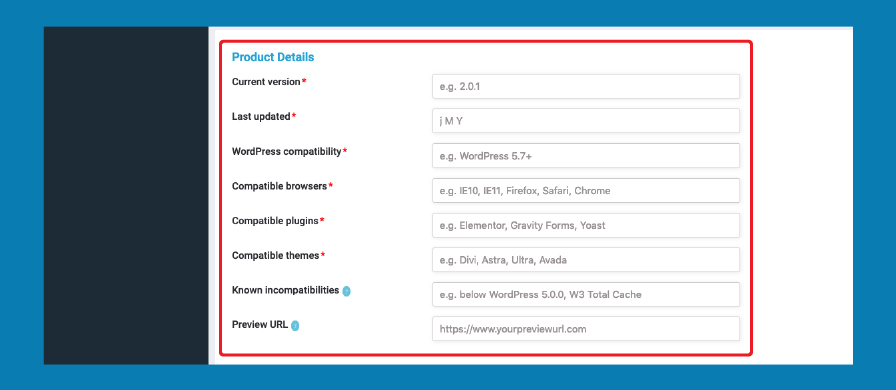
3. Enter product details
Fill out the extra product detail fields at the bottom of the page and try to be as accurate and thorough as possible. If your product is compatible with everything you can simply type “All”. If your product has no known incompatibilities or you can simply type “None” or leave blank. Preview URL is optional.
IMPORTANT: The preview URL cannot contain any purchase buttons that do not return the user to Gutenberg Market to make the purchase. Any attempts to direct users to another way of purchasing the product will result in immediate suspension of your account and all listings.
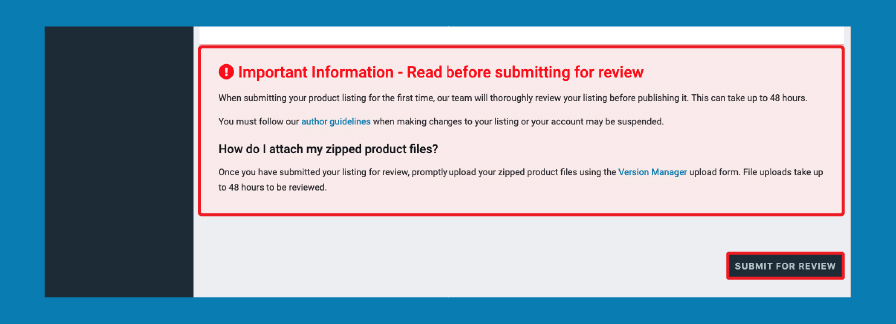
4. Read important information and submit
Before submitting your product, carefully read the information above the submit button.
Once you have completed your product listing, it’s time to upload your zipped product file using our Version Manager form. This file will contain either your plugin, theme or block component.
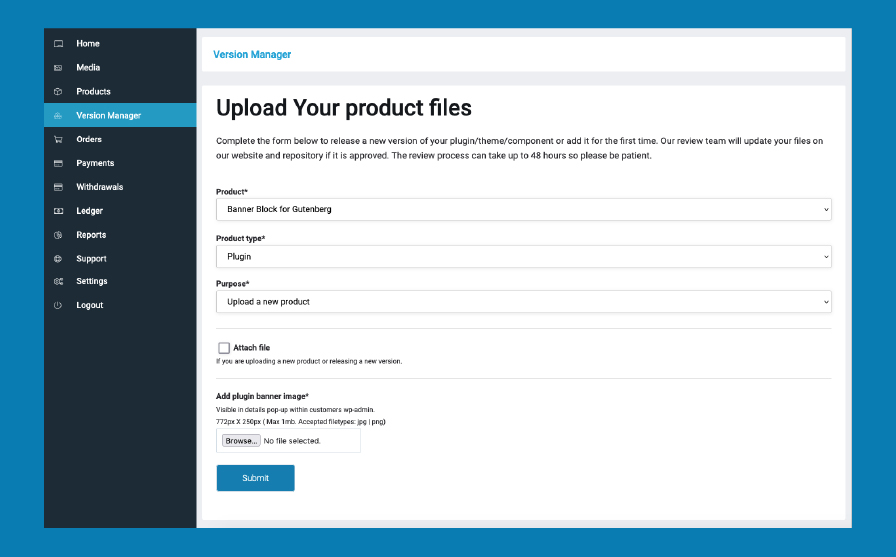
Step 1 – Select product
Simply select your product from the dropdown menu.
Step 2 – Select product type
Choose which type of product you are uploading. (Plugin, Theme, Component)
Step 3 – Specify purpose
Specify whether you are uploading a new product or releasing a new version. If this is your first time uploading your product file, you will choose “Upload a new product”.
Step 4 – Toggle hidden field
Check the box “Attach file” to show a hidden field. We have hidden this field by default in case you only want to update your plugin banner image. More details about the plugin banner image in step 6.
Step 5 – Attach file
We ask you to provide a URL where your zipped file can be downloaded. Popular options are Google Drive, Dropbox or OneDrive. The reason we cannot allow you to attach your files to the form, is because Google does not allow zip files containing HTML to be sent via email for security reasons.
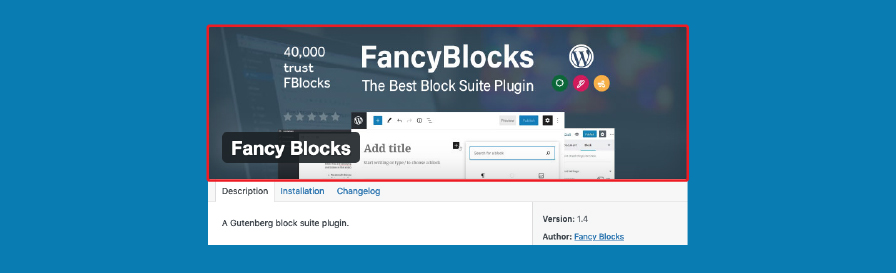
Step 6 – Add plugin banner images
If you are uploading a plugin, you must attach two banner images. These images must be exactly (low res 772 x 250 pixels) and (high res 1544 x 500 pixels). This is the banner image that appears when your customers click the “View details” link in their wp-admin plugin page. Here’s an example of how this appears:
Step 7 – Wait for approval
Once you have created your listing and uploaded your zipped product file, simply wait for our team to review your submission. The review process can take up to 48 hours but will usually be done quicker than this. Please be patient and only contact us if it has gone over 48 hours. You will be notified by email if your product has been approved or rejected.
Using accurate dimensions
Product listing featured image (720 x 425 pixels)
Product listing body images (720 x ANY pixels)
Plugin banner images (low res 772 x 250 pixels) (high res 1544 x 500 pixels)
Theme screenshot (1200 x 900 pixels)
What to do if my product is rejected?
We will provide you with a clear reason as to why your listing or file was rejected. It may be due to not following our author terms or because you haven’t followed best practices. It may also in rare scenarios be due to malicious code present in your file. Once you have rectified the problem, we will be able to review the submission again.
Why do my products need to be reviewed?
We quality check your listing and product files, whether it is a completely new listing or new version, for a number of important reasons. Firstly, we will scan and check your code to ensure there is nothing malicious hidden inside. Secondly, we will check your listing and files for any breaches of our author terms. Lastly, we will assess whether you have adhered to best practices when creating your listing and that there are no obvious errors.
Learn more about our quality check policy
Can I edit my listing if it is already approved?
Yes, if you are a verified author, and your listing has been previously approved, you can make changes to it at any time without having to go through the review process. However, if you want to release a new version of your product it will have to go through the review process again, because we need to quality check your new files for security and compliance with our terms.
How does licencing work?
We make licencing a breese for authors, by handling every aspect of it for them. Including licence generation, licence delivery, licence expiration and licence authentication. This gives authors the ability to simply focus on developing their products.
What are Auth tokens?
An Authentication Token is simply a very strong password that we can use in connection with a buyer’s username, to determine that they are a customer of Gutenberg Market.
Your customers will need to generate an auth token on our website so that they can receive updates to your plugins and/or themes. They will also need to download and install our Gutenberg Market plugin on their website and enter their username and auth token to receive updates natively in WordPress.